The world’s most brilliant blade. Real-time sound effects are produced. Any color can be changed on the fly. This project is the nearest you can come to feel like you’re holding a Lightsaber right now.
We’ll go through the project’s objectives, select the suitable materials and some of the software involved in building such a robust system in Part 1 of this series. We’ll be aware of the dangers ahead by talking about battery protection and the protections in place to keep you and your saber secure.
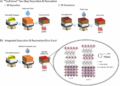
introduction
First and foremost, I needed the brightest blade ever—one that would look amazing in photos, even in bright sunlight.
That was accomplished using a 144 LED “Neopixel Lightsaber” strip (the highest density of 24-bit programmable lights currently available), a modern DC/DC converter, and a LiPo battery capable of supplying the watts it needs.
In reality, I made it so strong that my first blade melted. The actual limit is the heat produced by a double-sided strip in a tube; we’re doing the polar opposite of heatsinking. We should keep the LED strip’s power dissipation to less than 40% of the maximum to avoid thermal overload. Since white needs all three LED colors (red, green, and blue), we can’t have a full-brightness white saber, but we can have full brightness of one color with small additions of the other colors. For special effects, we can always “burst.”
What Are the Steps to Make a Neopixel Lightsaber?
My secondary objective was more esoteric. A Lightsaber is more than just a long torch. There’s also “The Hum,” a growling purr that alerts you to the fact that you’re keeping something powerful.
This sound effect is generated in the movies by the legendary Ben Burtt retiring to a studio for several weeks and waving microphones around. There was never a single physical entity that made that noise (unless you count his entire mixing desk).
In reality, the software aspects of creating fluid real-time audio effects took up the majority of this project’s time and effort.
This “sword” is aware that you are carrying it. It will also become still if you remain still. You’ll hear it if you swing it unevenly. It will automatically switch off if you set it down.
Since there is a computer inside, this is possible. A companion inertial measurement unit and an Atmel 32u4 Neopixel-compatible “Pro Micro” (IMU). To that end, another way to approach this project is to ask: Can we build a “user interface” that is so natural that we forget we’re using it? And it’s so tough it can be dropped on bricks?
Finally, I wanted my saber to have a polished appearance. I’ll go into the physical structure of my hilt at the end of the series (from hardware store PVC pipe and fittings). This is where I want you to put your imagination to work. Since each Lightsaber is an expression of the maker’s personality and local materials, no two should look alike.
I’m not a particularly imaginative prop maker—I prefer simple and functional—but there are plenty of fantastic examples of saber hilts made from plumbing parts, hollowed-out metal torches, and even advanced kits.
Be aware that the parts for this project are very large, and the “slimline saber hilt” kits are too small (sorry). My main diameter was 32mm PVC pipe (which is actually 40mm across), and even that was close. However, since high-capacity batteries and DC/DC converters are shrinking, slimmer builds would be necessary for the not-too-distant future. This project sets out to test the boundaries of what is possible.
You might also change the controls or sound effects if you’re good with Neopixel code. While you’ll see a voltmeter read-out in all of the videos, it’s not an official part of the build because it made wiring more difficult than it needed to be. Bench-testing with a multimeter accomplishes the same aim.
Lithium-Polymer Battery Warning
This project is basically a toy, but it does make use of an RC-grade LiPo (Lithium Polymer) battery and power system, which can be dangerous if treated incorrectly. The voltage is healthy for humans, but the electricity (20 amps, 200 watts!) is enough to start fires if a short-circuit occurs. I expect you to carefully monitor its use if you create this saber.
Lithium-ion batteries have unique handling criteria. They must be properly charged and never allowed to go “flat,” or they will blow.
Always have a procedure in place for safely removing an overloading power cell. A good place to start is with fireproof bags. It should be noted that water exacerbates Lithium fires.
This will all be familiar ground if you’ve designed multirotor or RC (remote control) aircraft before. (It’s essentially a quadcopter without propellers.) Otherwise, this is an advanced project that necessitates caution and strong construction skills and one that will ideally provide you with experience with these types of power systems.
Getting Parts
The RC components, such as the battery, DC/DC converter, and connectors, can be found at Hobbyking (if not at your nearest model aircraft shop), while the rest can be found at DigiKey, SparkFun, eBay, and other online retailers. The rest is made up of hardware store PVC pipe and plumbing fittings.
The Hobbyking YEP 20A HV (212S) SBEC (Switch-mode Battery Eliminator Circuit), also known as the MTTEC KETO HV BEC 12S, is the main component. Which system is what allows a hand-held saber to exist. I’m not aware of an equivalent, but I’ll look into it. For the time being, it’s the most important aspect of the construction.
That’s all there is to it for DC electricity. We now have an Atmel32u4 microcontroller and an MPU6050 IMU, two of my favorite semiconductors.
The project is built around the physical form of the “Pro Micro” and uses features exclusive to the 32u4 (such as the high-power Timer4), but other Neopixel Leonardo–compatible boards can work with minor modifications.
They must be the 5V version, with a clock rate of 16MHz. Both in the form of voltage (to control the LED strip) and processing power, the 3.3V version is insufficient (to run the sound synthesizer).
The majority of online “1 meter” LED strips are actually two 50cm strips joined together with a visible gap in the center. That’s perfect for a 50cm “Shoto” blade; all we have to do now is disassemble the strip back into its two halves. It’s convenient! And they’re cheap, too, at under $30 on eBay right now.
This is consumable if you wish to “battle” with your saber. If you have enough hits, you’ll finally crack it, so keep an eye out for bargains. If you have backup blades, the design allows for quick blade changes in the field.
If you want a longer blade (a complete Lightsaber length is 70-90cm), you can either buy more expensive continuous strips (which I don’t know where to find) or change the cheaper strips by whittling, tucking, folding, and resoldering to close the join distance.
Make sure the LEDs you buy are WS2812b. The 5050 LEDs should have FOUR pins per package and be close together, and the strip should have THREE connections on each end. There are just three of them. Not two (a single color strip), and certainly not four (an analog RGB strip or a separate serial protocol).
For full light reflection from the blade, you’ll also want a strip with WHITE background (not black) and an IP65 silicone coating for physical safety. (The IP67 and IP68 versions have a thicker rectangular sleeve that will most certainly not fit.) It should be the same price, with the option to upgrade when ordering. Because of the significantly increased physical robustness (shock-proofing), the silicone coating can provide the blade, as well as the minor additional heatsinking it offers; you can get the waterproof edition.
The blade tube is a vital component that should be procured as soon as possible. I used a 25.6mm external Diameter (1 inch OD) 22.2mm wall thickness polycarbonate tube (1.6mm wall thickness) from Profile Plastics, but I’ve since found a cheaper and better source at The Custom Saber Shop, which have transparent “blade tips” as well. Those are extremely difficult to come by!
I used a transparent tube with a packing foam sheet light diffuser wrapped around the LED strips in my design, but I’d probably try their Translucent White tube for a more professional-looking blade. When it comes to assembly flaws or imperfections, the clear tube is a bit too transparent, and if you watch hard, you can see the LED dots. It would have been great to have an additional layer of diffusion.
Unless you want a full-length saber or wish to fight with it, a normal/thin-walled tube should suffice. Because the LED strip is very wide (12-15 mm) and we need some space for the light to disperse around the edges, I don’t suggest starting with the thinner 3/4 inch tube or the thick-walled tube. I have yet to try them.
A word about the material: Polycarbonate tube is needed. Perspex, acrylic, transparent PVC, and other plastics are not appropriate. Here’s why:
The polycarbonate tube is not brittle at any time. It can withstand a shotgun blast and still be intact. It can be twisted and smashed (so don’t drive a car over it), but there’s no way you’ll be swinging half a shattered and jagged plastic tube around. This is critical for me and anyone who wishes to remain healthy.
Since it is less optically transparent than Perspex, Polycarbonate has a slightly bluish tint. That isn’t sure for us, but if you’re in question, it may help you recognize “real PC.”
The Pipe Compression Coupler secures the first 8cm of the blade tube in the hilt in this construction, leaving around 2cm of free space at the far end. As a result, you’ll need a tube that’s 10cm longer than the LED blade; a half-meter blade would need a 600mm tube.
And, indeed, a 25mm OD tube fits perfectly inside a “20mm Pipe Coupler.” (The inner diameter of the PVC water pipes corresponds to the inner diameter of the iron pipes they replaced.) PVC conduit connectors are properly dimensioned but not pressure rated.)
The shape and location of the sound effects speaker is another fairly personal preference. A standard magnetic coil speaker is needed to properly capture the bass notes (sorry, piezo just won’t do), but they come in a variety of shapes and sizes.
A 2-watt speaker is loud enough, and I used a reclaimed 40cm component that happened to fit within the PVC endcap that served as the hilt’s ‘pommel.’ Replacement laptop speakers are interesting, and they come in a variety of sizes, including long and rectangular ones that could suit slimmer builds.
We’ll need an amplifier to power it, and there are plenty of small class D modules available. Only mono performance is needed, and the quality does not need to be exceptional. With a few extra bits, the SparkFun/Genentech amp does the job nicely.
The individual components have a lot of leeways, but the requirements don’t have much. Don’t downgrade anything if you’re making substitutions. In order to put all of this into a pocket-sized interface, we’re pushing all of these components to their design limits.
Controls and software
A description of how the firmware works would require a separate article and would not benefit the build, so for now, I’ll just explain how to use it:
The saber has a number of options, including sound volume. If that were it, a single volume knob would suffice. Another knob may be added to control the blade color. There would be no space on the hilt to position our hands if we added a third knob for color saturation, a fourth control to ignite/retract the saber, and four more to tweak the audio frequencies.
Instead, all of the controls are controlled by a single physical knob (which is also a push-button), which changes its mode when pressed in. The first few LEDs along the blade will go dark while you’re doing this, and a “menu marker” will show the current mode. It also helps that these rotary controls will spin indefinitely with no fixed point of zero.
To set the mode, push and turn the knob. Then release and spin it normally to change the value of that parameter.
If you rotate the knob too fast, the controller may skip notifications (it’s busy doing a lot of things), and you will even go back a notch. Slow and steady is the way to go. (This can be improved in future versions of the software.)
Some of the modes loop around (like color), others reach maximum and minimum values (like volume and mode itself), and still, others are difficult to describe (like the doppler division parameter, which can go negative), but I’m sure you’ll figure it out.
To be honest, it isn’t the most user-friendly interface on the planet, but I challenge you to squeeze more features into a single knob.
Also, keep in mind that if the saber loses control, it will forget everything. You’ll have to change some magic numbers in the source code and re-upload it if you want custom presets.
Safety and Power Management
Remember when we spoke about how dangerous LiPo batteries can be? The following is how I built this project to keep your blade from catching fire and to keep it clean. Please don’t get rid of these protections.
When you don’t switch the saber for 90 seconds, the firmware has a screensaver that retracts the blade—in case you put it down somewhere and forget about it.
It also tests the battery sense voltage on a regular basis, and if it senses an Undervoltage condition (defined in the firmware as about 10.5v, or 3.5V per LiPo cell), it darkens the blade and emits loud, irritating beeping noises before you turn it off. This is an important safety feature when working with high-capacity LiPos, and it’s a good idea to calibrate the figures in the code for your power device.
The following bad things will happen if you disable the voltage sensor or otherwise allow the blade to remain on: The blade will begin to draw a large amount of power, the DC/DC converter will keep draining the battery at growing amperages and will never stop, and the battery will HEAT UP as it loses its last watts, causing it to outgas, catch fire, and EXPLODE. Rarely, though sometimes. You’ve already heard the legends. It would almost definitely reduce the LiPo’s potential and make it less secure to use in the future. (Protection circuits are common in small LiPos, but higher-current RC LiPos, such as the one powering the saber, are “unprotected.”)
The controller’s most important job is to monitor the battery voltage and switch off the LEDs when necessary. That’s the cost of pushing the envelope and relying on such a high-density power grid. But for that, feel free to mess with something.
If the power falls below 5 volts, the lights will not turn off. The batteries will scream, the microcontroller will crash (removing the alarms), but the LEDs will keep doing what they were designed to do before you manually turn them off. Before entering the red zone, the controller must be able to sense an Undervoltage condition and stop it.